Create a schema
Author a schema two ways — infer the fields from a sample document, or build them by hand — tune each field's type and rules, then publish a version a pipeline can bind to.
A schema is the contract for a document class: the named fields IDPForge extracts, their types, and the rules that decide what passes. You author it once in Library → Schema, publish a version, and bind that version into a pipeline's Extract stage.
Workspace admins and pipeline builders who author schemas in Library and bind them into pipelines.
1. Open the schema wizard
In Library, the Schema tab lists every schema in the workspace with its status, active version, field count, and the pipelines it is used in. Choose New schema and the wizard asks how you want to start.
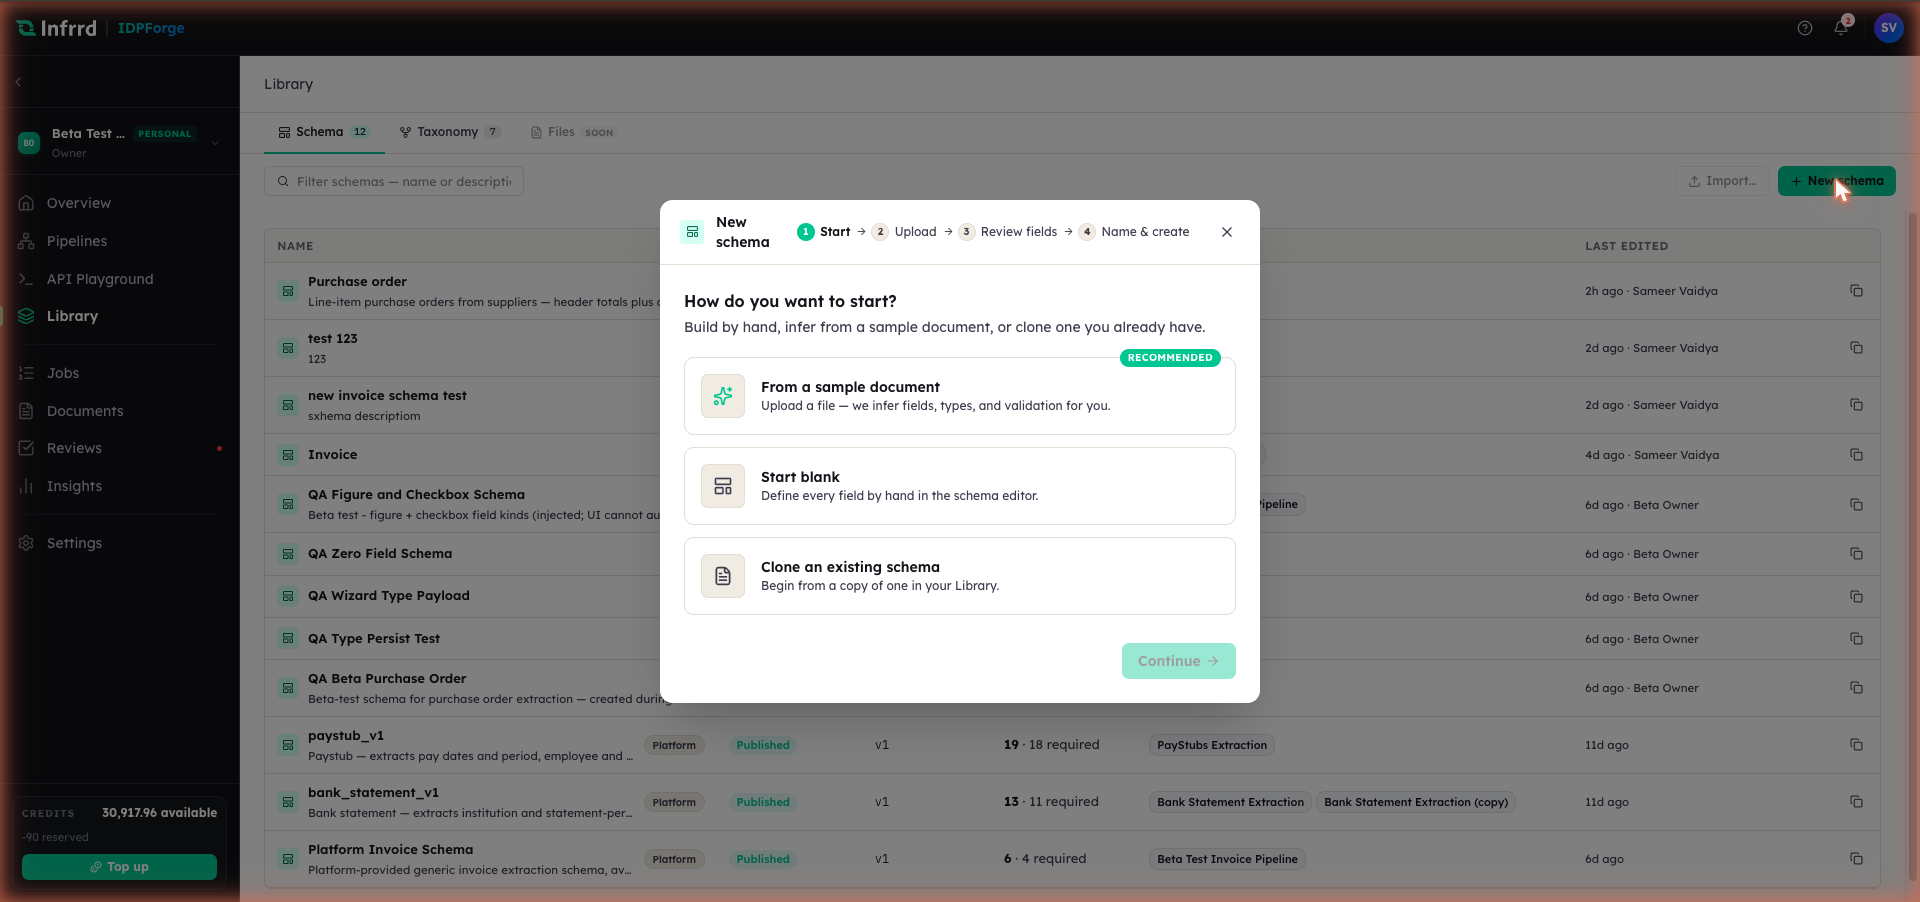
The starting point decides the first steps, not the result — all three land in the same field editor. From a sample document is the fastest path when you have a representative file; Start blank gives you an empty editor; Clone an existing schema copies one from your Library.
The two paths below are equally good. Infer-from-sample is quicker when you have a clean example on hand; building by hand gives you exact control from the first field.
2. Infer the fields from a sample document
Choose From a sample document and drop in one representative file — PDF, image, or Office document. A single clean example works better than several messy ones.
IDPForge reads the file and proposes a field for every value it can extract, working through four passes: reading the document layout, detecting fields and tables, inferring types and validation, and building the schema draft.
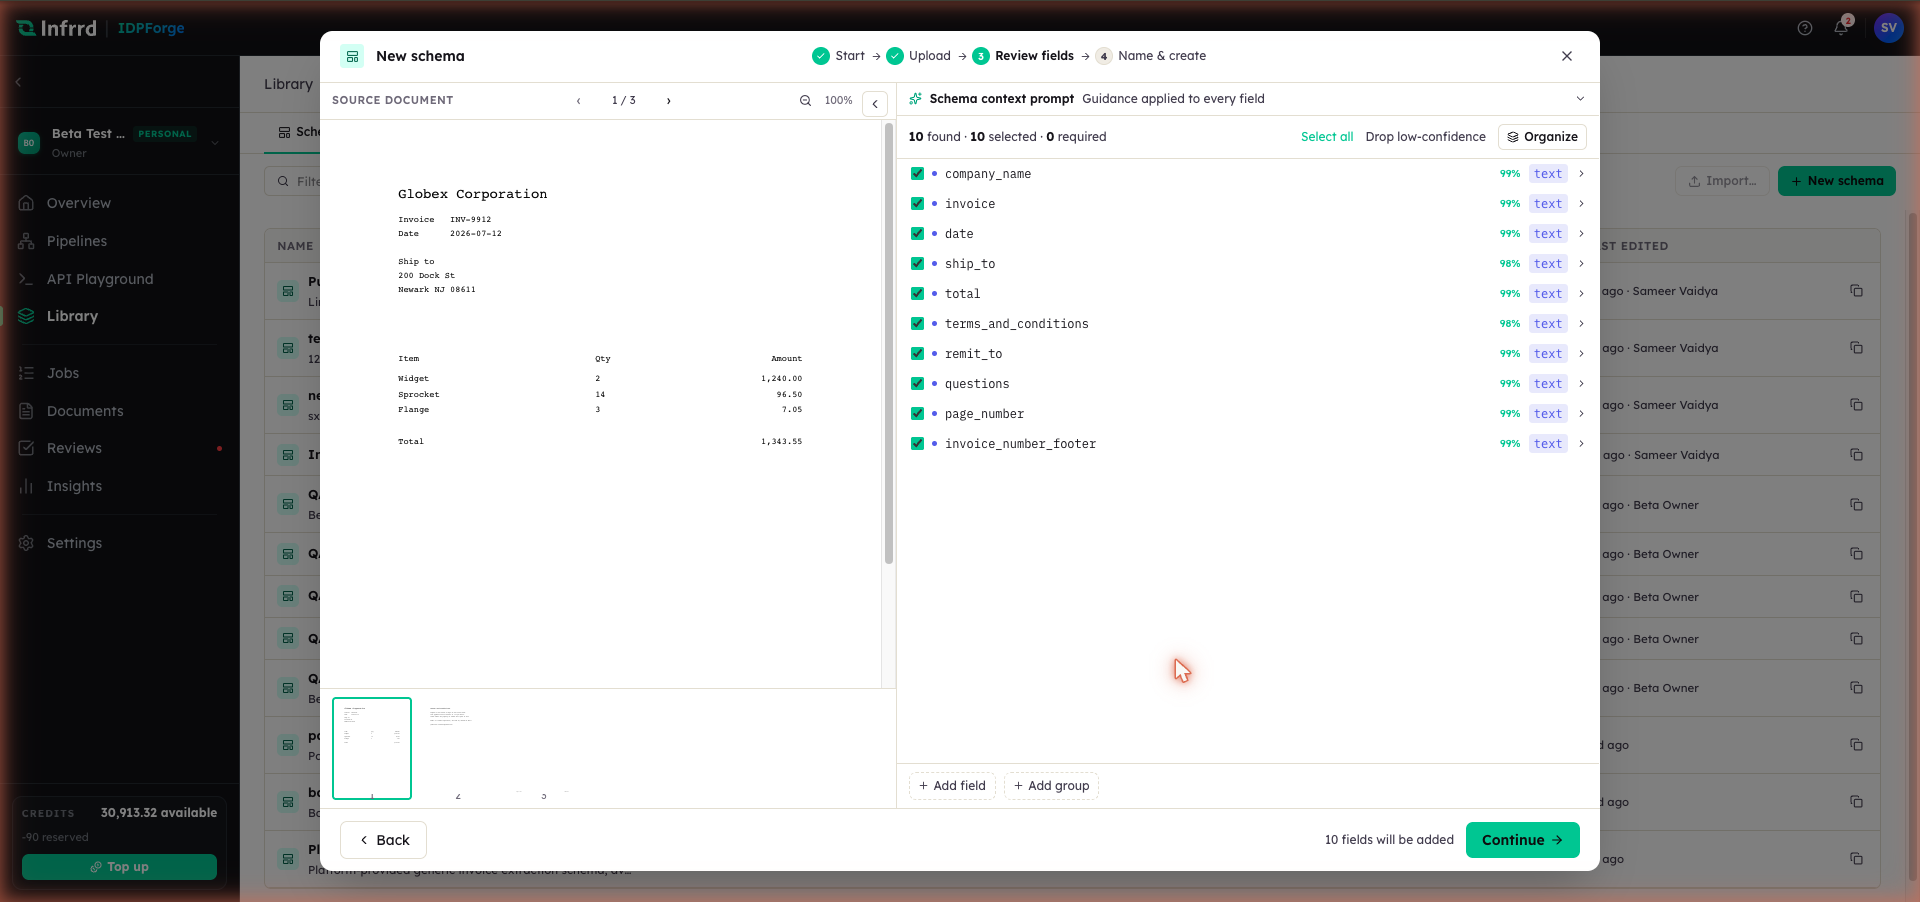
The review step puts the sample on the left and the proposed fields on the right. Each field carries the confidence of the inference and its inferred type. Clear the checkbox on anything you do not want, or use Drop low-confidence to clear every proposal scored below 80% in one action.
Keep the fields that belong in the contract and drop the rest — a footer field or a page number the model happened to read is rarely worth extracting. Continue carries your selection into the naming step, where the summary notes it was inferred from your sample.
3. Or build the fields by hand
Choose Start blank and name the schema first: a clear name and description tell teammates and downstream services what the contract is for. The schema context prompt is guidance applied to every field at once — the document type, the language, the currency, and what to prefer when a value is ambiguous.
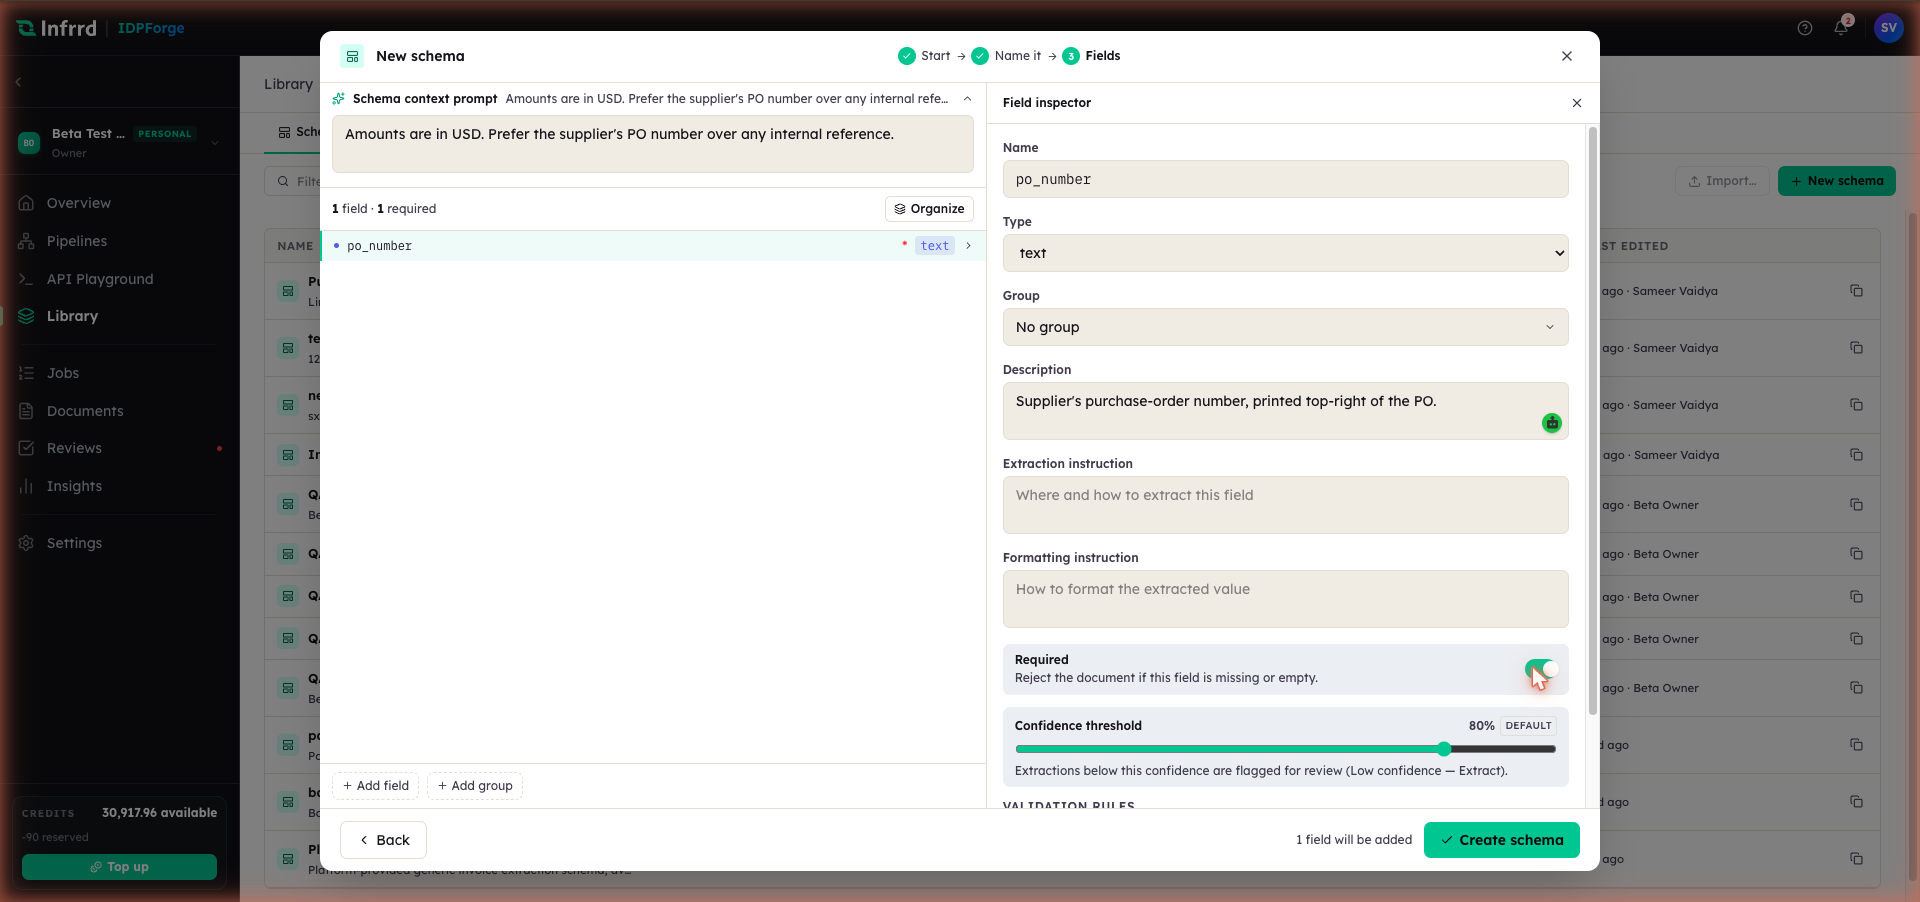
The field editor. Add field appends a field; Add group starts a nested group of related fields. Selecting a field opens the inspector on the right, where its type and rules live. A schema needs at least one field before it can be created.
4. Configure a field
Select any field — inferred or hand-added — to open its inspector. A field carries a name, a type, and an optional group, plus the guidance and rules that shape how it is read:
| Setting | What it does |
|---|---|
| Type | One of text, long text, number, currency, date, boolean, enum, checkbox, radio, table, or group. |
| Description | A human-readable note for teammates and reviewers. |
| Extraction instruction | Where and how to read the value — a direct instruction to the model. The schema editor labels it Extraction prompt. |
| Formatting instruction | How to shape the extracted value, for example a date format or a currency's decimals. |
| Required | When on, a document where this field comes back empty gets a required field is missing validation error on the field. |
| Confidence threshold | Values scored below it are flagged low-confidence. Inherit follows the schema-wide threshold; Override sets one for this field only. |
| Validation rules | Optional constraints on the accepted value; Add rule to start one. |
The schema-wide threshold is set once at the top of the schema editor, under Confidence threshold · all fields. A threshold set on a pipeline's Extract stage takes precedence over both the schema-wide and per-field values.
Use table for repeating rows — line items on an invoice — and group to nest fields that belong together. Both keep related values structured instead of flattened into one long list.
5. Publish a version
Creating the schema saves it as a draft. A draft is editable and is not yet usable by a pipeline; publishing snapshots the current fields into an immutable, numbered version.
Choose Publish, write a release note describing what this version contains, and confirm. The first publish mints v1.
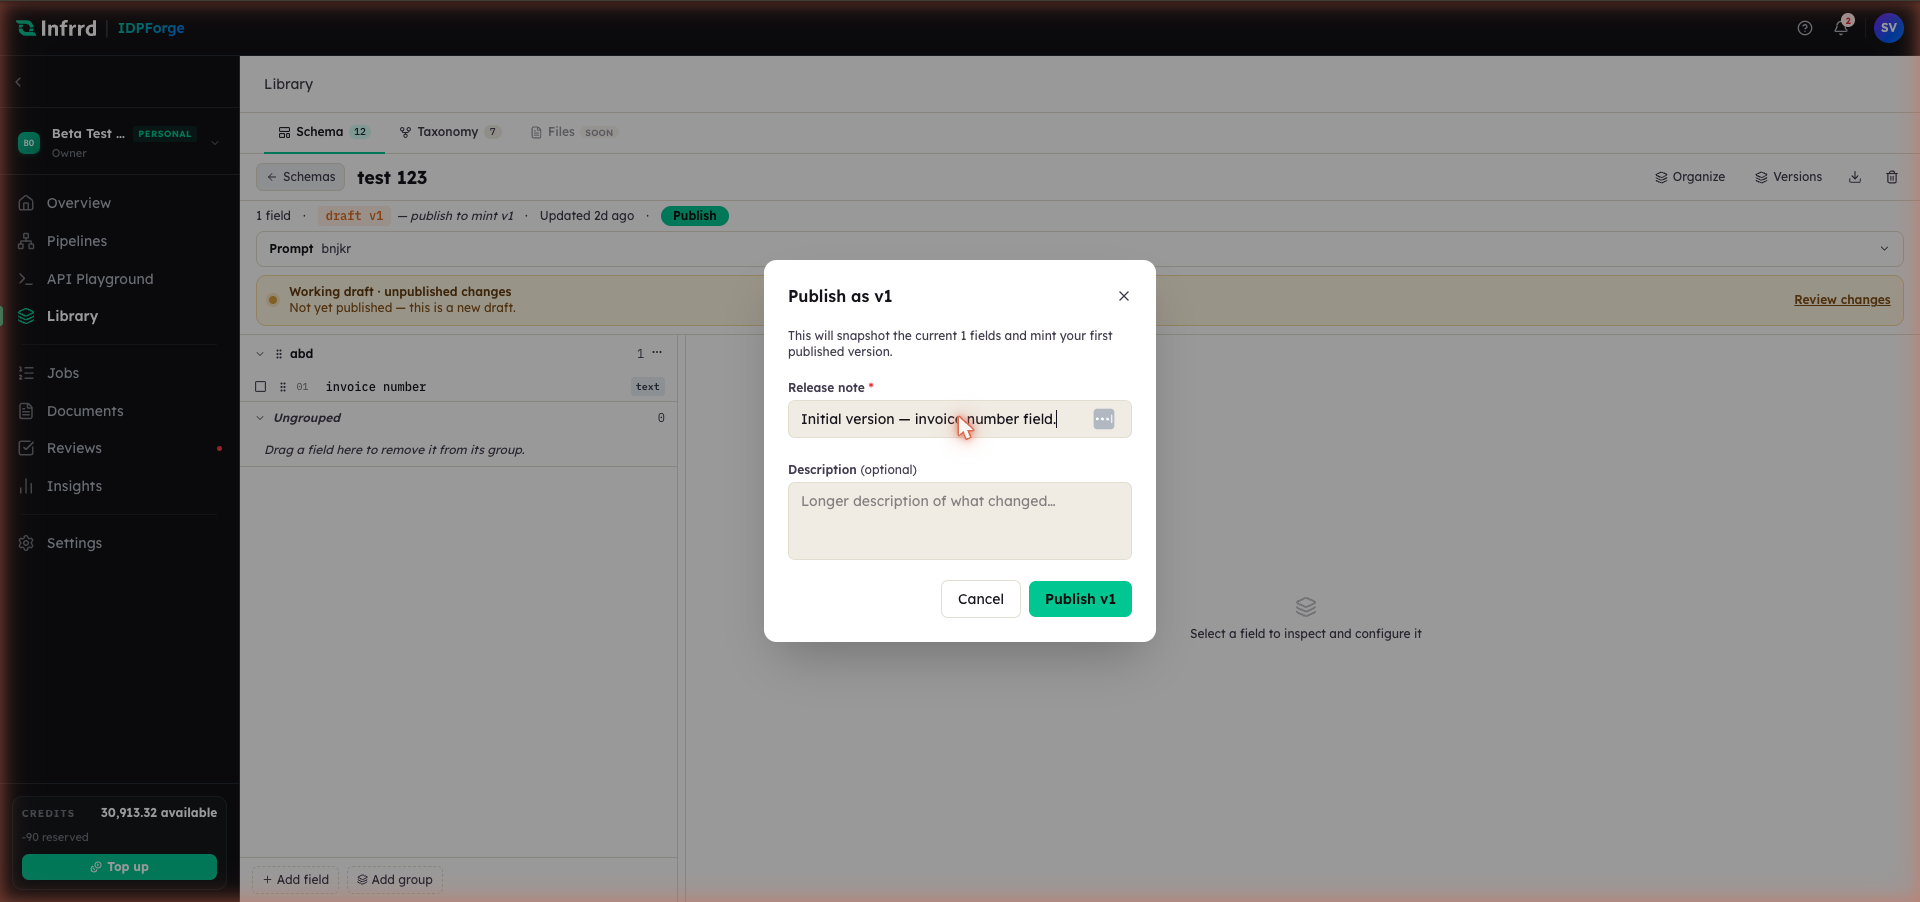
The dialog names the version it will mint and how many fields it snapshots. Publish v1 stays disabled until the release note is filled in; the longer description is optional.
After publishing, the working-draft banner clears and the version badge shows the live version. Versions in the header opens the schema's version history.
Edge cases
- Pipelines run published versions, never the draft. Editing a published schema starts a working draft on top of the live version. When you publish, an Extract stage set to Latest published picks up the new version; one pinned to a specific version stays on it until you change the pin.
- Required and low confidence flag; neither rejects. A missing required field and a value below its threshold both mark the field for review on the result. They open a review task only when the Extract stage's Send exceptions to Reviews toggle is on — it is off by default.
- Cloning copies fields, not history. Clone an existing schema starts a fresh draft from a copy of another schema's fields; the clone has its own version line from v1.
- A class with no bound schema still extracts. With no schema bound, Extract runs generic extraction and returns free-form JSON instead of validated fields — see Extract.